Even in an urban setting with limited space, creating a garden is easy, fun and delicious
Instead of a recipe, this is article will help you create your own ingredients by starting a garden from the food in your kitchen. It’s actually easy to do and it avoids wasting food. With just a little know-how and a minimal amount of work, you can start making a garden today. The concept is called vegetative growth, which means no seeds are involved. You just regrow your vegetables.
Start a garden from the food in your kitchen
1. Garlic
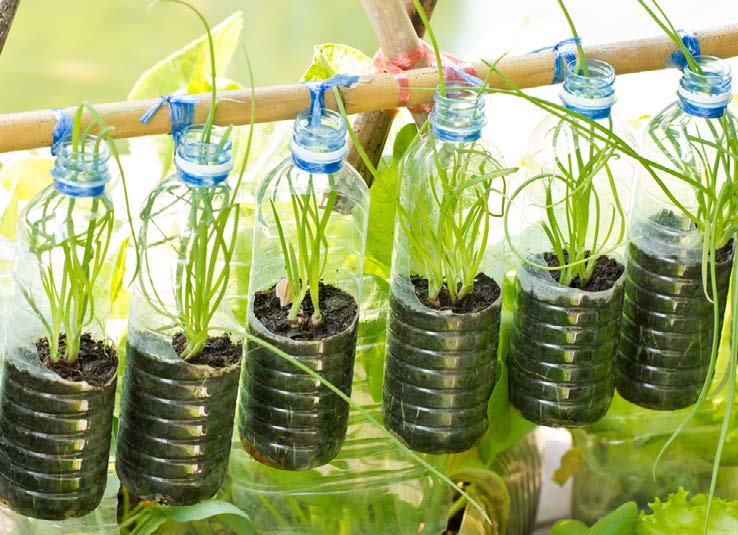
Choose the larger cloves of garlic from your clove. This is what you’re going to plant! Eat the smaller segments. Since this plant won’t take up much space (the above-ground part will shoot straight up), a small container works perfectly. Grab your empty yogurt, hummus, or butter containers. Poke holes in the bottom of the container for drainage, and use the lid as a water catch for the bottom. Easy! You just made a planter. With plastic water or juice bottles, cut in half and flip the top around to fit snuggly into the bottom half. Now you can put soil in the top, and it will drain into the bottom.
To plant: Use potting soil to fill your container, and plant bulbs 2-3 inches apart into the soil, pointy end up (smaller containers may fit just one). They like to be 4 inches away from their nearest neighbor. Keep the soil moist but not soggy and wait patiently for the greens to shoot up. Harvesting can be a tricky matter, but awaytogarden.com cites “experts” as saying that you should dig up the bulb when “several of the lower leaves go brown, but five or six up top are still green.”
I looked to Gayla Trails book “Grow Great Grub” for information on how to use recyclables as planters as well as how to plant garlic. Check out her website: http://yougrowgirl.com/
2. Celery
Have you ever felt guilty cutting your stalks of celery off and mercilessly abandoning the bottom part? We’ll call it the trunk. Well rid yourself of all the guilt and make more! Rinse off your celery trunk and place it face up in a bowl of warm water. Over the next week, you’ll notice the stalks go yellow, but the inside will sprout new leaves! I predict you will be very excited when this happens. After about one week, you can transfer this celery-clone into a planter.
You can use the same method listed above to make a planter, but use something bigger. Another option would be to use a spare colander, or pick one up at a second hand store. These containers drain really well, but might be better for patio/outdoor planting as the holes will leak some soil. To plant your celery, bury the dying stalks in soil but leave the new leaves exposed
3. Bok Choy
This is exactly the same method as I explained above, but with Bok Choy!
4. Green Onions
Next time you buy scallions or green onions, place them in a cup/jar/vase of water. Chop off the tops of the plant as you need, and they will regrow! It’s so magical, people will be throwing you in pools of water to see if you float! You can eventually transfer the onions to soil for more long-lasting growth.
5. Potatoes (this one is a little more of a project)
Ever wonder why people have told you to cut the sprouts out of your potatoes? Potatoes belong to the family Solanaceae, which also includes tomatoes and eggplant. These plants are known for containing alkaloids, some of which are poisonous, others of which are desirable.
To regrow your potatoes, leave them in a cool, dark spot until they resprout. Each point of resprout is your “seed,” so chop up the potato according to where the sprouts are.
It’s fun to grow them in a trash can, because you are going to keep adding soil as the plant grows taller. I read about this in “Grow Great Grub,” by Gayla Trail. Read similar articles on her website: yougrowgirl.com.
You need to drill holes in your trashcan for drainage. As if we needed any excuse to wield a hand drill! Drill ten holes on the bottom and add extra on the sides if you live somewhere very wet. Place three cement blocks or bricks at the bottom. This makes for even better soil drainage.
Fill the trash can with 6 inches of soil then spread your spud seeds 5-6 inches apart. Cover with 2-3 inches of soil. Water the soil so that it stays moist and you should see plants emerge after a few days! Add more soil once they have reached 8 inches. Keep repeating this process until the plants are flowering. At this point, you water the plant less and wait for the vines to dry out. The withered vines are your signal to harvest your taters! All in all this takes 65-100 days.
I hope you find this article inspiring! Next time you chop off the stems of your celery, maybe you’ll think about the next generation that could be!
__________________
By Hope Freije
Annmarie Gianni Skin Care